
Let me give you a scenario, you are a university student scouring online trying to find literature that would help you in your research project/thesis. You finally found the paper that you think will be useful to you. You are happy, you have accomplished the first phase of your project. You happily move on to the next phase, which is running experiments, you try to see if the author has cited a Github repositoiry in the paper, search on PapersWithCode.com for unofficial/official code repository, you even do a basic google search for the code, unfortunately there is no open-sourced implementation. You start to panic, the model architecture is too complicated to code, you realize you can only build simple models and all of the complicated models that you have used till now were available online. Your brain is now hyperactive and you start overthinking, suddenly you are stuck in a whirlpool of overwhelming thoughts. Well, at this moment the first thing I would suggest would be do something to calm yourself maybe go for a walk, take a short nap or whatever works for you and then go through this blog. These are a set of rules that I follow when I want to replicate or create a complicated model architecture.
As a university student you are expected to read tons of papers and go through the respective model architectures, understand them, identify their pros, cons and applicability to your projects and be able to code them if not available. It sounds a lot, it is a lot, but soon you will come up with a system that will make it easy. This blog in particular is aimed at building a system for the coding part, you can add modify it as you wish.
Let’s dive in…
1 – Gather information
The first step would be to gather information that the model needs. In a basic scenario it would include
- Data properties – See if the data on which you are training has similar properties to the data that the author has trained the model on. In a more advanced scenario, if the data is different think if the model can work for your data.
- Input type – Images, text, numbers etc.
- Output type – Classification, 2D/3D regression, time-series etc.
- Loss function to be used – Be sure that you have understood the loss function, as that is what will eventually train the model
- Evaluation metrics – Select the right metrics to evaluate the learning capability of the model
This is the easiest step and it will form a baseline for your model in the coming steps.
2 – Understand the model
This is also useful before you decide to implement the code for this model. Ask your self the following two questions.
- What is the intuition behind this model?
- How is it actually learning the model?
When I say understand the intuition what I mean to say is “What do you think the model is learning? Do you think the model will learn the things that the author has claimed they would?”. Never just assume the claims mentioned in the papers are true, you need to think through this, there might be a scenario where it will not work for your data or your goal. Analyze the architecture and think if this would work for you. With time and practice you will get better at this.
For the second part, ask the following sub-questions “Does the gradient flow make sense? What part of the architecture is learning what? Does everything combined help you learn the goal you want?”. To understand this part focus on the gradient propagation and the loss function of the model.
Usually, I ask myself these question when I am going through the paper but I have included this here because this will also help you in coding.
3 – Visualize the model
Try and draw the model on a piece of paper. If it is a normal network maybe draw some fully connected layers. If it is a CNN maybe draw a 3D image like structure as layers in the model. The more accurate you draw the more clearer it becomes when you are coding. As humans we tend to soak a lot more information when it is presented in a visual form. Utilize this strength and draw an accurate representation of your diagram. Things that you need to take care of when creating a visualization are follows:
- Use a single format for each type of layer. If you have started using 3D box like structure for CNN block then use that for the future CNN blocks in your model. Do not change it to a 2D box. It will confuse you when you are coding and are not paying attention. Your brain needs to associate a particular drawing to a particular layer type.
- Write down the dimensions for each layer this will help you in avoiding mismatch in dimensional compatibility for consecutive layers, when you are building it on your computer. For example, The output of layer_1 is (16,16,3) but the next layer is a dense layer it is a good idea to reshape the output of the layer_1.Optionally you can also write the number of parameters at each layer. I do not do this, as it consumes time and Tensorflow gives the number of parameters at each layer anyway.
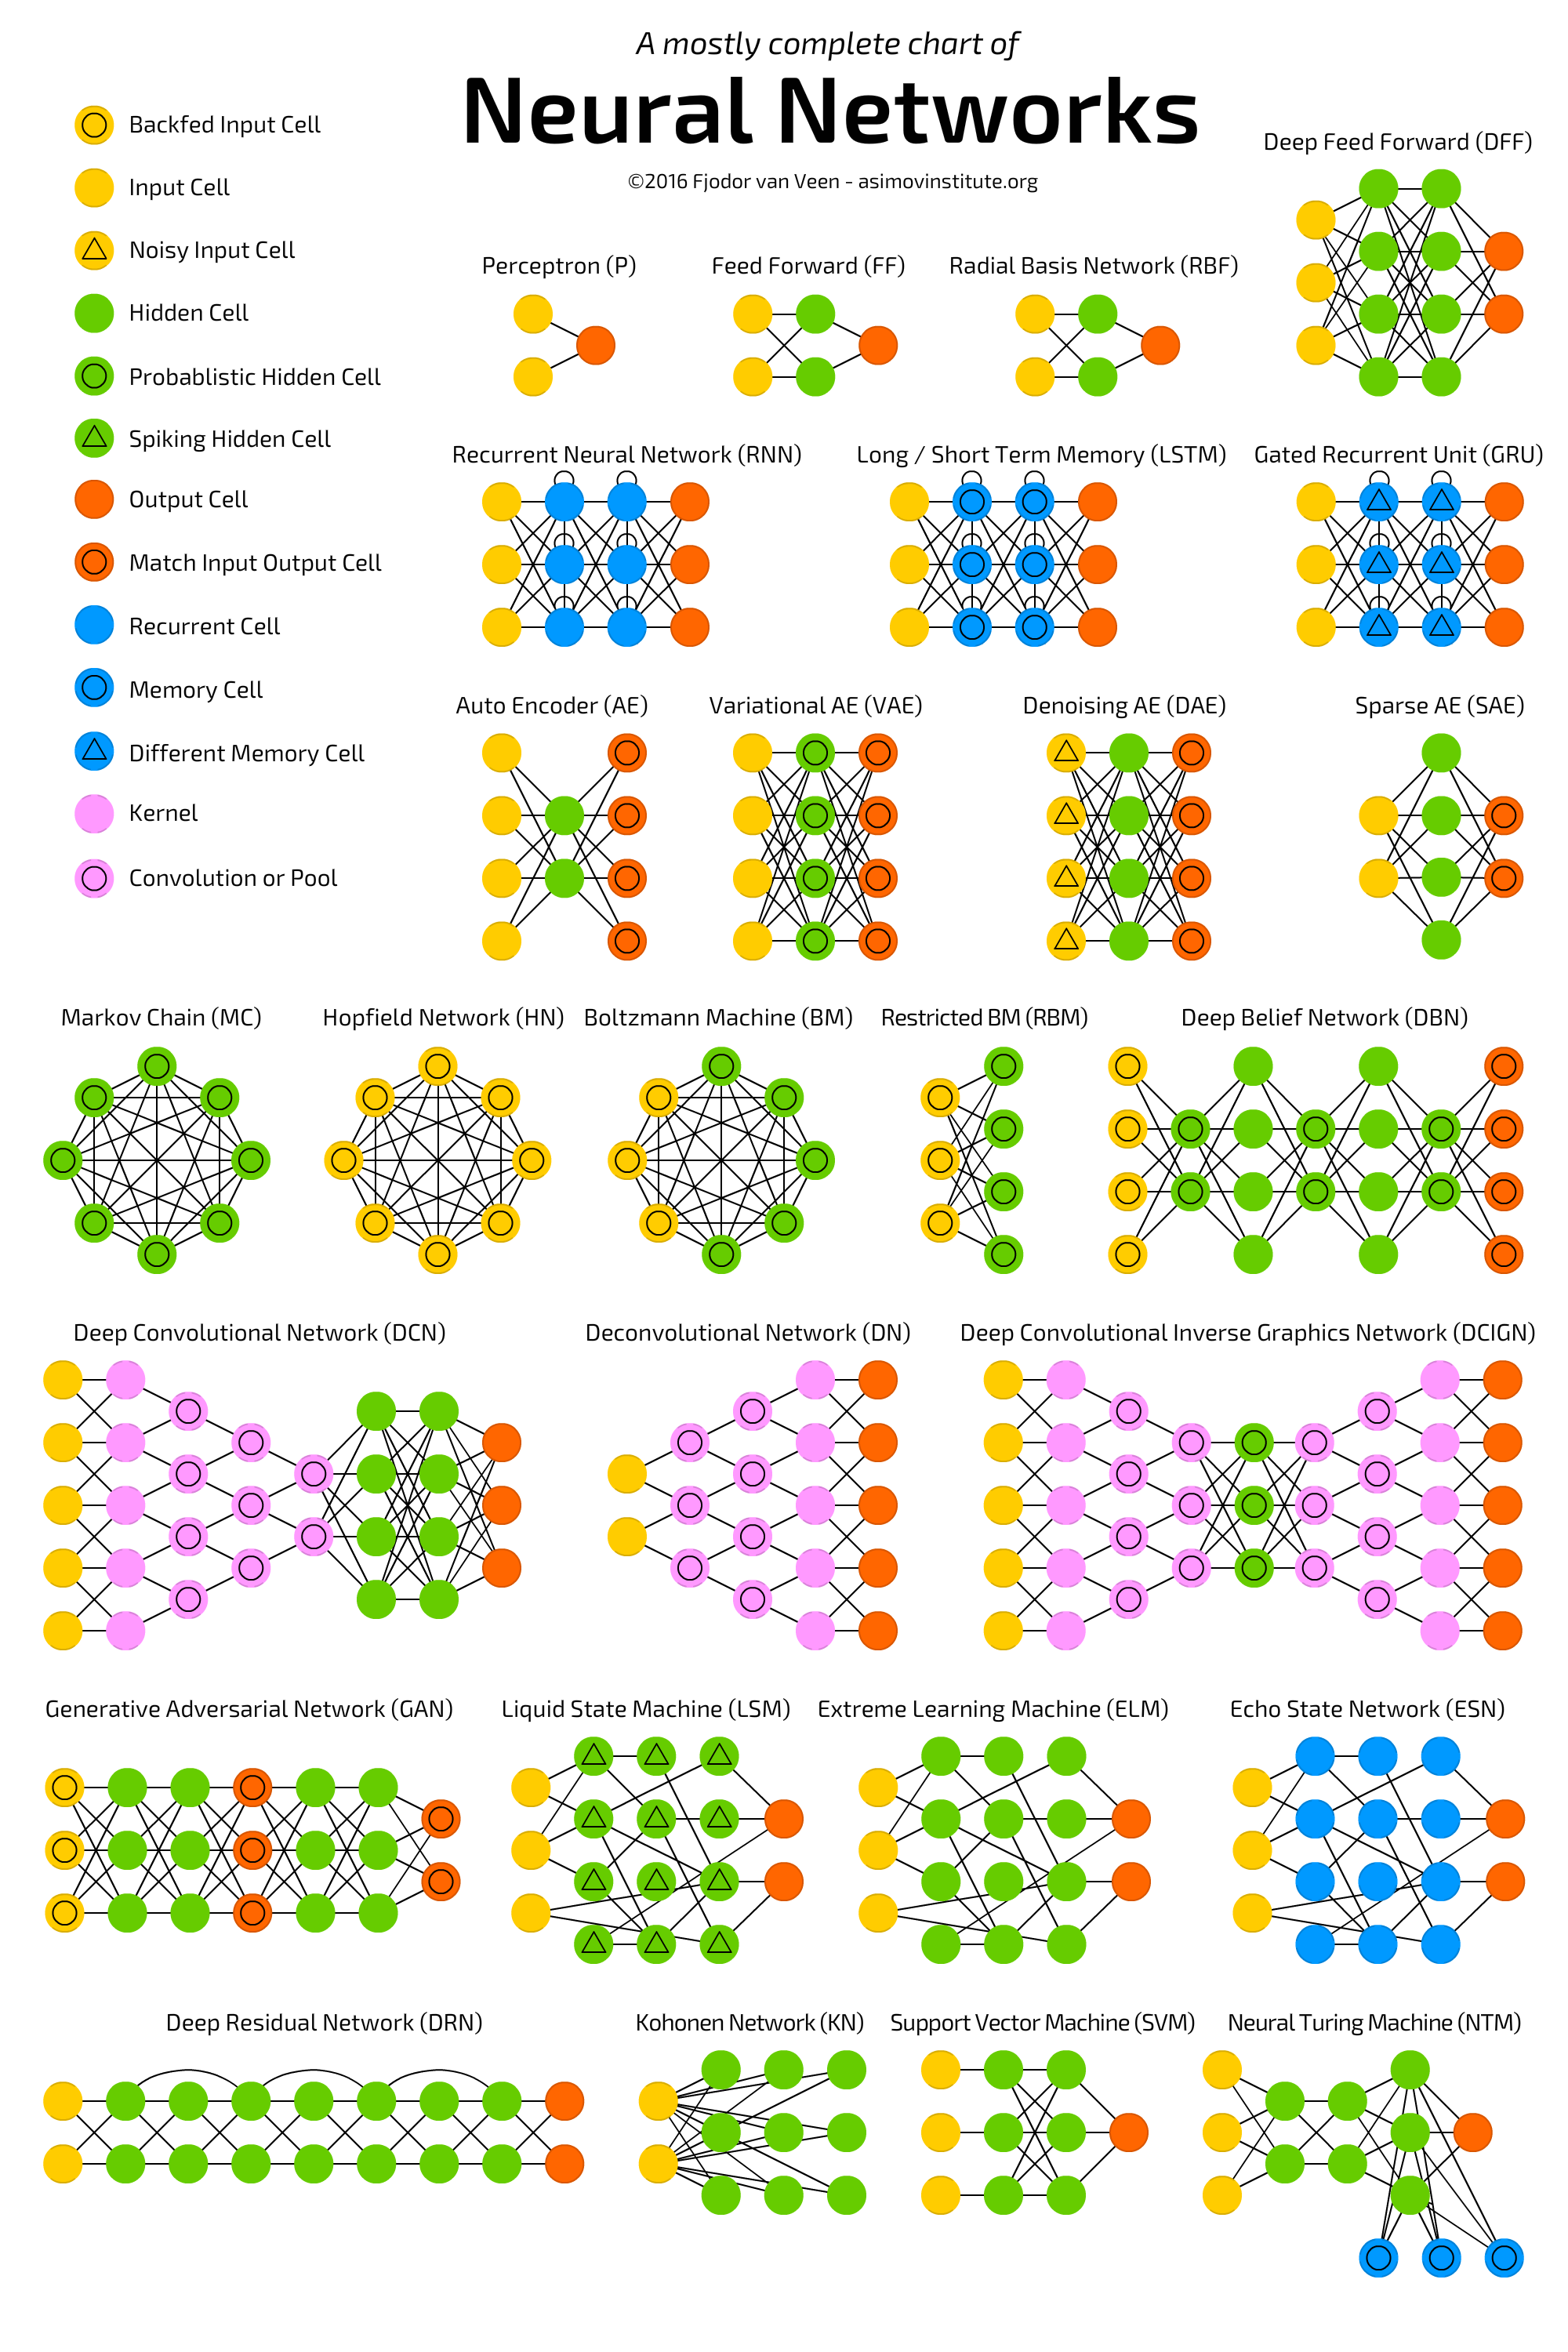
This is the most important step that will really help you during coding. Also, a good example for the first point can be seen in the below diagram by Fjodor van Veen. The author has used the same visualization for each type of layer in all the architectures in the picture. You do not need to follow the same rules, you can come up with your own, but remain consistent. Soon, you will see an impact of the visualization in your code, especially for extremely complicated architectures.
Do not underestimate this process it is really helpful, plus it is fun.
Finally coding 🙂
Now, this is my favorite part where everything comes together. Use the visualization and start creating models. You will realize how easy it is to just build it if you follow the above three steps.
For the sake of keeping it short I am not adding code in this blog, but if you would you like to see a code example then, comment down below and please leave a like on post. Please share this if you found this helpful.

Leave a comment